DOWNLOAD THE CALIBRATIONS TO AN ECM USING CUMMING INSITEE SOFTWARE
INSITEE Professional enables ECM calibrations to be downloaded directly to an ECM. Click Calibration Selection on the Viewbar to select, view, and transfer calibrations.
The process of downloading a calibration can be summarized in four steps:
Step 1. Select an ECM part number.
Step 2. Select a Certification Codes (right-click menu) for your location.

- Certification Codes and Agencies

Double click a certification code in the Available Certification Codes panel to select it or highlight a code and click Add. Use the same procedure to remove a code from the Selected Certification Codes panel, except use the Remove button.
When you click OK, calibrations that comply with the selected certification requirements will be displayed in the calibration list.
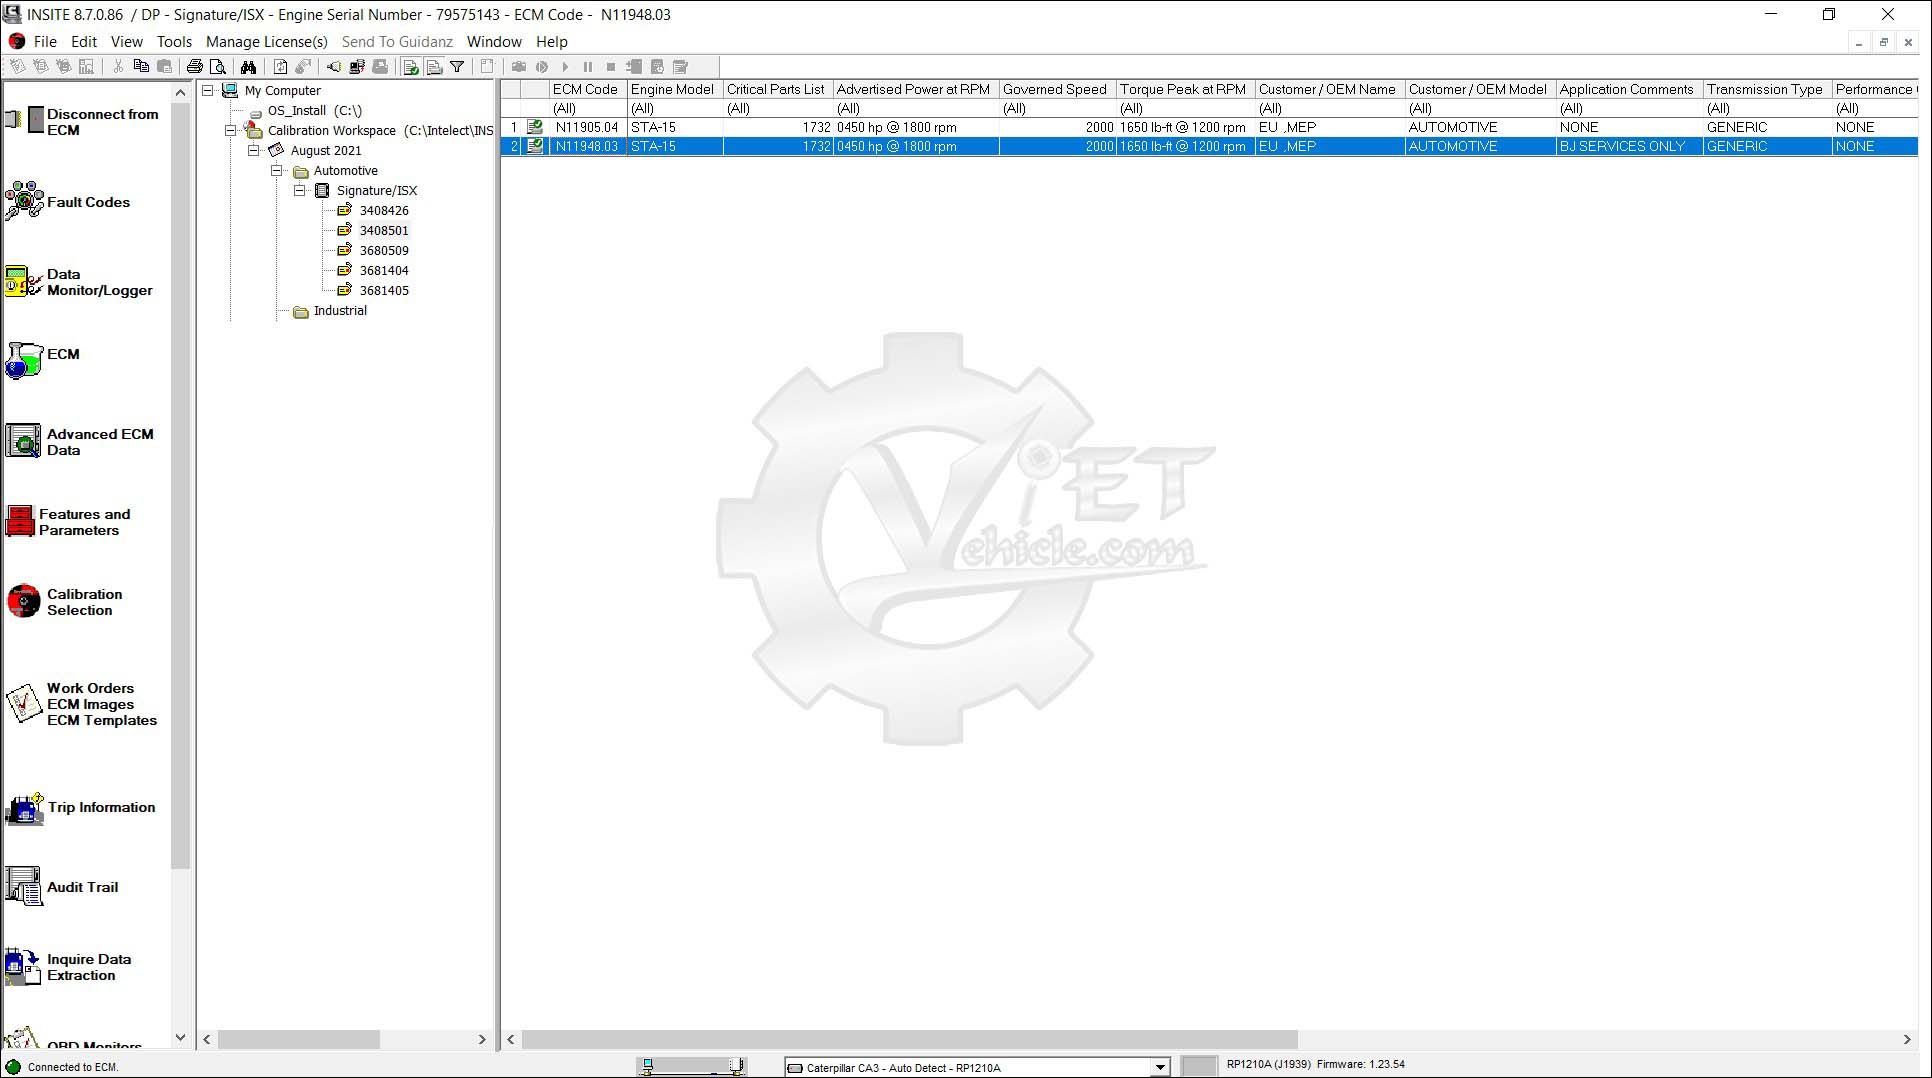
Step 3. Select a calibration.
Step 4. Send the calibration to the ECM.
- Transfer to ECM (right-click menu)
Select this option after highlighting a single calibration to transfer the selected calibration to the ECM (This option is not available if you are not connected to an ECM).

a). Select Transfer to ECM. IMPORTANT!! Read the "Warning!" message displayed on the welcome page carefully and select Next to continue.

b). If a calibration authorization password is required, the Calibration Authorization window will open. This displays the requested ECM Code and PCID which is needed to obtain a password from the Cumming Distributor. A Fleet Calibration Count or a Calibration Authorization Password must be entered. Select Next to continue

c). A System ID and Dataplate information window will open. →Verify or modify the System ID and Dataplate information. The values that are not locked may be changed by double-clicking in the right-hand column and entering a new value. →If desired, select Save/Restore Adjustable Parameters if available. This option saves the adjustable parameters and then restores them to the ECM after calibration download has been successfully completed. If Save/Restore Adjustable Parameters is not selected, or if the connected ECM does not support it, the adjustable parameters will be set to the default values of the new calibration.
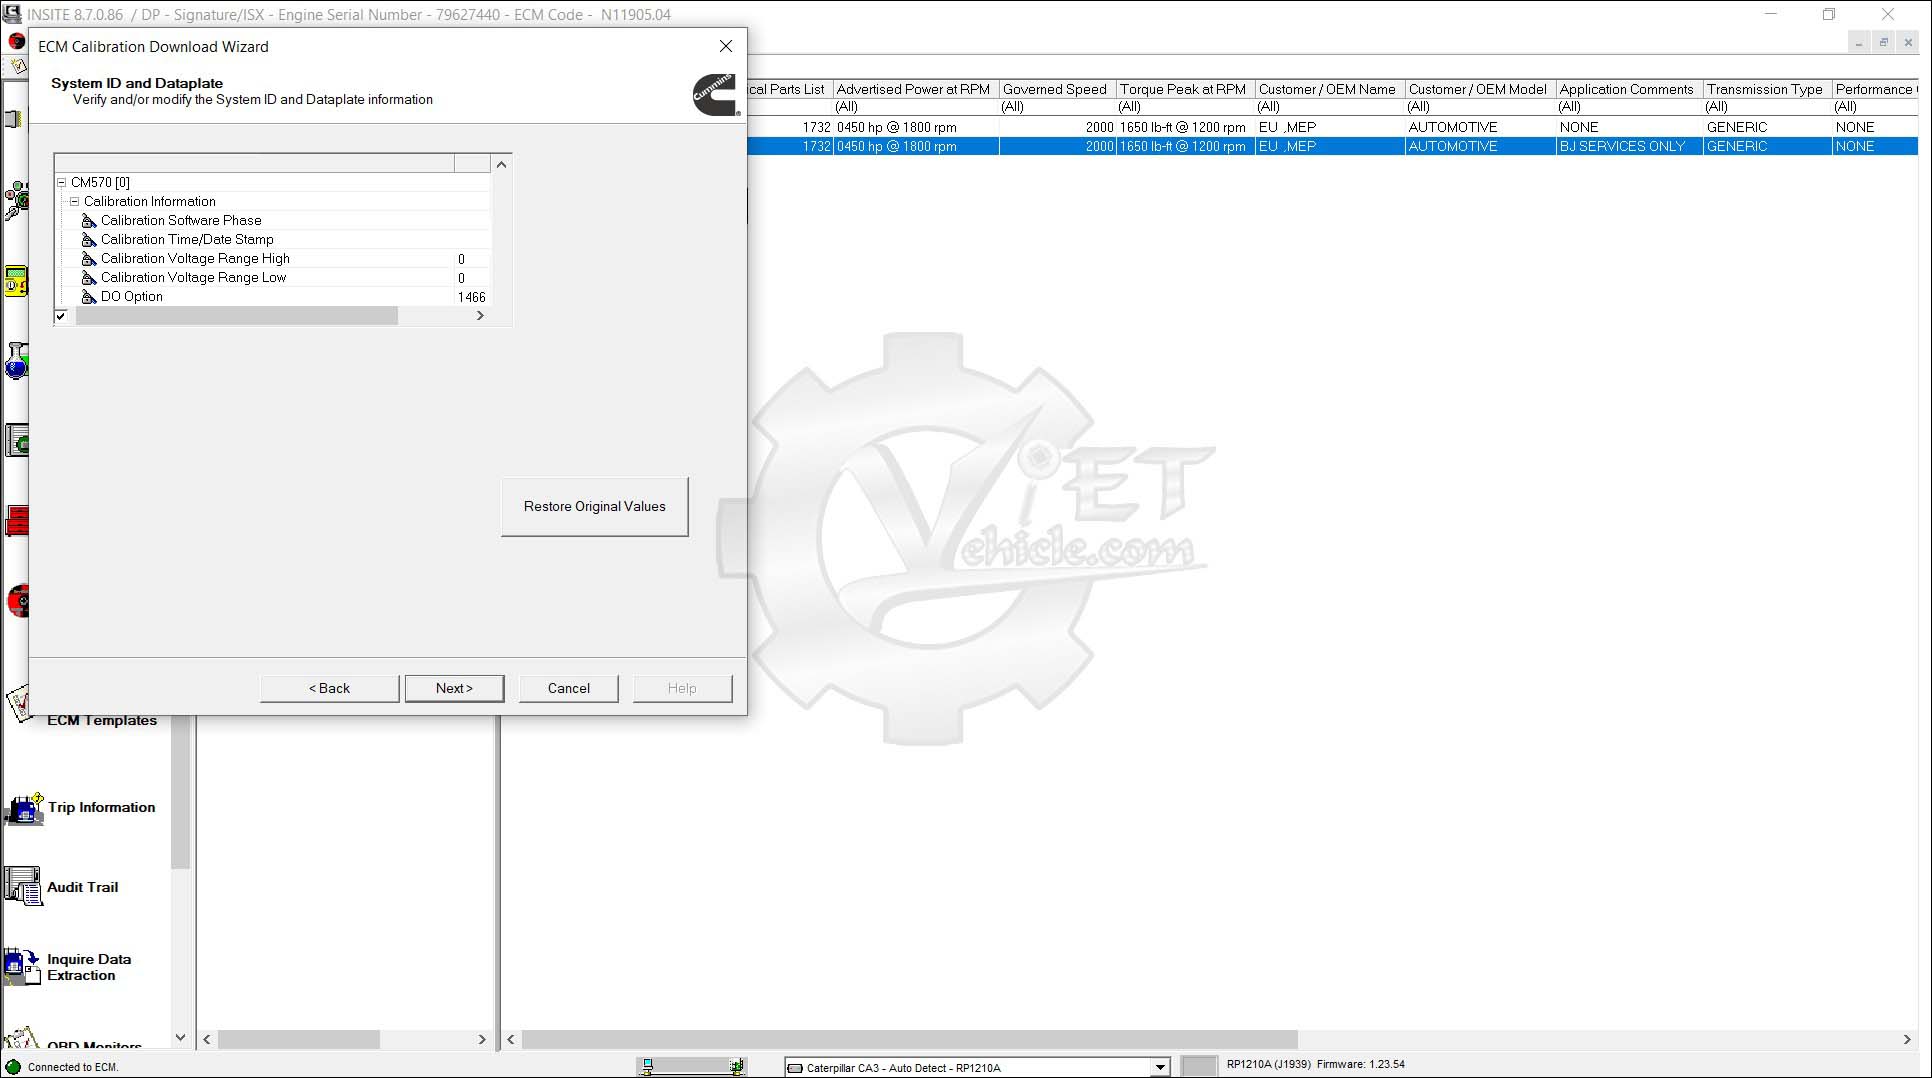
→To undo changes, click Restore Original Values or select Next to continue.
d). Verify the Summary information is correct and select Next to continue.

e). An Adjustment Confirmation message will appear. Select OK to continue.

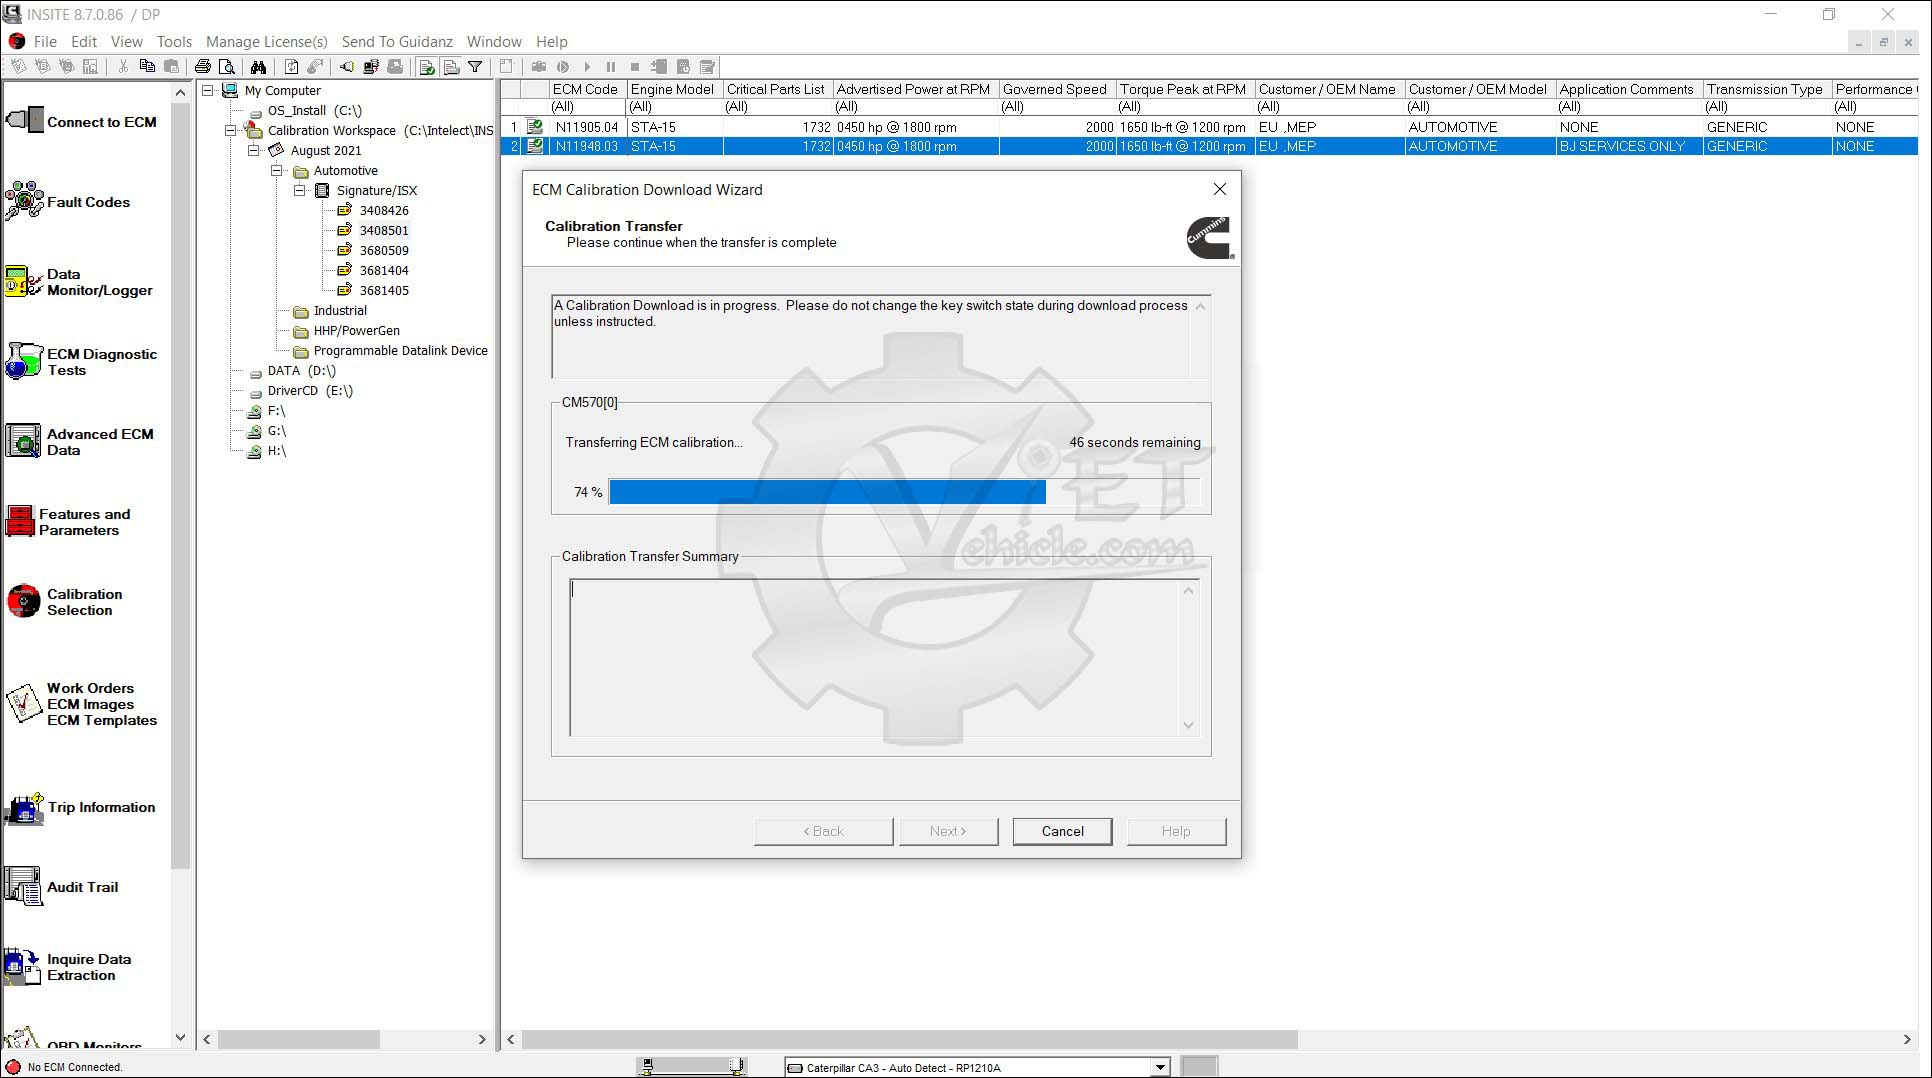
f). INSITEE™ will begin calibrating the ECM. Follow the prompts and do not turn off the key switch unless instructed.

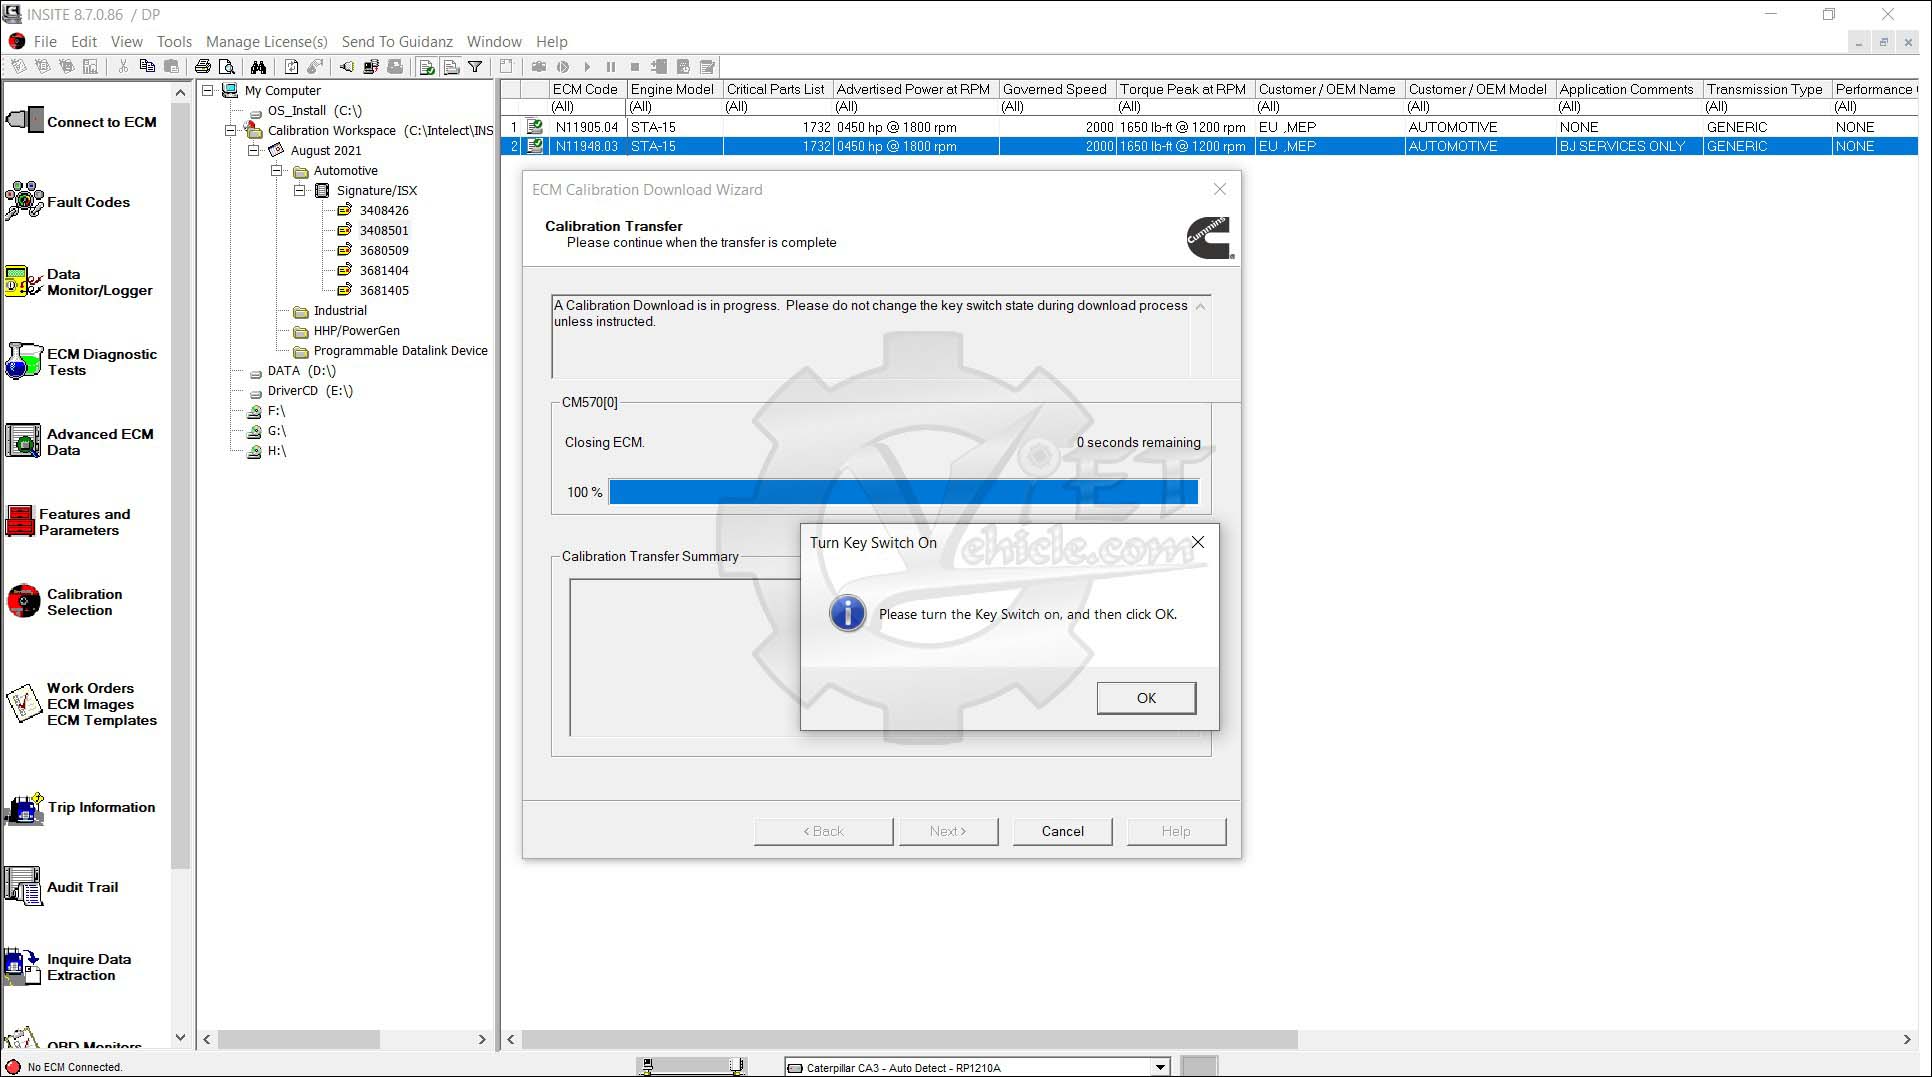
g). At the end of the calibration download, it will be necessary to cycle the key switch. Follow the INSITEE™ prompts as required.


h). After calibration transfer has completed, the results of the calibration transfer and Save and Restore (if selected) will be displayed in the Calibration Transfer Results window. This will also appear in the Calibration Transfer Summary window. Select OK.

i). Select Next to continue.
j). Select Finish to close the ECM Calibration Download Wizard, then will displays New ECM Image.

DONE!

Please fill in the form below, so we can provide you with an up-to-date information about our new arrivals.